Moving in a tenant using the 6Storage admin portal is a simple, step-by-step process. Follow the instructions below to complete a new rental.
Start the Move-In Process
Begin by clicking the Move In button from the toolbar at the top of the screen.
Step 1: Select or Add a Tenant
- If the tenant has stored with you before, search for their name using the search bar or select them from the list.
- If this is a new tenant, click the Add New button.
- If they have stored with you in the past, select them from the existing list.

From here, you can enter the tenant’s details including:
- Name, address, and contact information
- Alternate contact information
- Marketing preferences
- Any custom fields you've set up for your facility
*Note that all of the move-in fields are customizable through the Customization settings. Most fields you can opt to not show, show as optional, or show as mandatory. First name, Email, and Phone are permenantly mandatory.

Step 2: Select a Unit
Choose the unit the tenant will be renting:
- Use the dropdown filters on the left side to narrow down your search.
- Select an available unit from the list.

Once the unit is selected, you can:
- Assign a gate code and define access hours (if your facility uses an automated gate system)
- Enter vehicle information, if applicable
- Set permissions for any alternate contacts who are allowed to access the unit

You can also update:
- Billing information - for example, if you want to choose a different Invoice Period, Billing Cycle, or make any changes to the default information
- Discounts, - ensure you have plans set up under Settings -> Financial -> Discount

Step 3: Add Optional Items
In this step, you can include any additional items the tenant will be paying for, such as:
- Content Coverage
- Fees or Services
- Merchandise

Step 4: Review and Submit
- Review all the selected options and charges in the "Cart" on the right.
- Once everything looks correct, click Submit and Proceed to finalize the rental.

Step 5: Capture Signature and Payment
After submitting, the system will prompt you to:
- Collect the tenant’s signature for the rental agreement. There are two ways to do this:
- In-person on a tablet, touchscreen, or double monitor set up
- Send Link to E-sign - this sends the esignature module through a link to the tenant's email
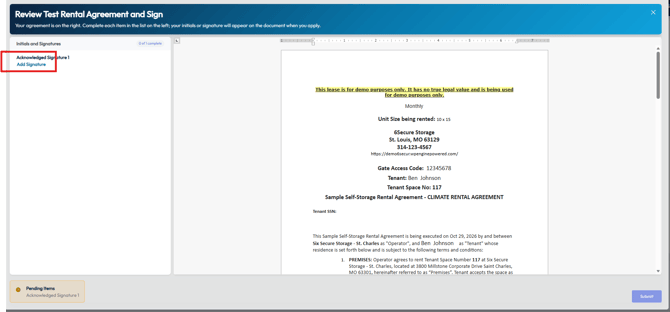
Esignature Module - the tenant will click Add Signature (or Add Initials, where applicable) to interactively sign the applicable places through the lease.
The signature will take a few seconds to apply. After all have been applied, the Submit button will activate.
- Process the first payment - select payment type and Submit
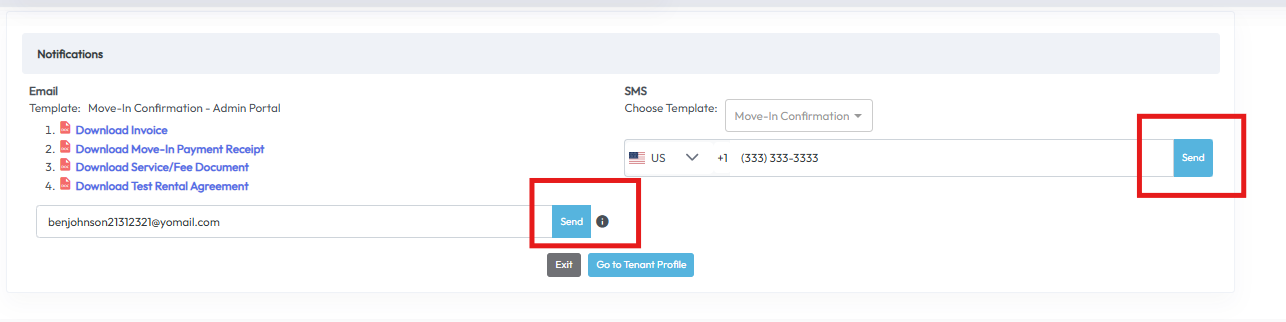
Once both are complete, the move-in process is finished,ed and a final screen displays the options to send the Move-In Confirmation templates (email and SMS) to the tenant.
You do need to click Send in both Email and SMS places for it to send.